JavaFX选择框
JavaFX选择框允许用户在几个选项之间快速选择。
创建一个选择框
我们可以使用ChoiceBox中的构造函数来创建ChoiceBox对象。
以下代码显示了如何使用其构造函数创建和填充选择框。 列表项是从可观察的列表来创建的。
ChoiceBox cb = new ChoiceBox(FXCollections.observableArrayList("A", "B", "C"));
我们还可以使用一个空的选择框使用它的默认构造函数,并使用setItems方法设置列表项。
ChoiceBox cb = new ChoiceBox();
cb.setItems(FXCollections.observableArrayList(
    "A", "B", new Separator(), "C", "D")
);
上面的代码还向选择框中添加了一个分隔符对象。分隔符分隔控件项目。
示例
import javafx.application.Application;
import javafx.beans.value.ChangeListener;
import javafx.beans.value.ObservableValue;
import javafx.collections.FXCollections;
import javafx.geometry.Insets;
import javafx.geometry.Pos;
import javafx.scene.Group;
import javafx.scene.Scene;
import javafx.scene.control.ChoiceBox;
import javafx.scene.control.Label;
import javafx.scene.control.Tooltip;
import javafx.scene.layout.HBox;
import javafx.scene.paint.Color;
import javafx.scene.shape.Rectangle;
import javafx.stage.Stage;
public class Main extends Application {
Rectangle rect = new Rectangle(150, 30);
final Label label = new Label("Hello");
public static void main(String[] args) {
launch(args);
}
@Override
public void start(Stage stage) {
Scene scene = new Scene(new Group());
scene.setFill(Color.ALICEBLUE);
stage.setScene(scene);
stage.show();
stage.setWidth(300);
stage.setHeight(200);
label.setStyle("-fx-font: 25 arial;");
label.setLayoutX(40);
rect.setStroke(Color.BLUE);
rect.setStrokeWidth(3);
rect.setFill(Color.WHITE);
final String[] greetings = new String[] { "A", "B", "C", "D", "E" };
final ChoiceBox<String> cb = new ChoiceBox<String>(
FXCollections.observableArrayList("a", "b", "c", "d", "e"));
cb.getSelectionModel().selectedIndexProperty()
.addListener(new ChangeListener<Number>() {
public void changed(ObservableValue ov, Number value, Number new_value) {
label.setText(greetings[new_value.intValue()]);
}
});
cb.setTooltip(new Tooltip("Select the language"));
cb.setValue("English");
HBox hb = new HBox();
hb.getChildren().addAll(cb, label);
hb.setSpacing(30);
hb.setAlignment(Pos.CENTER);
hb.setPadding(new Insets(10, 0, 0, 10));
((Group) scene.getRoot()).getChildren().add(hb);
}
}
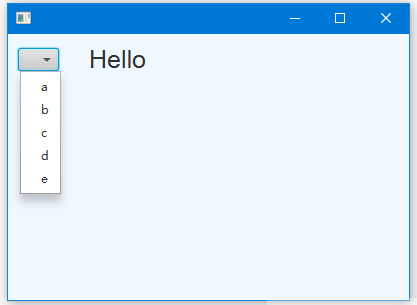
上面的代码生成以下结果。
实例-2
以下代码显示了如何在ChoiceBox中填充数据。
import javafx.application.Application;
import javafx.collections.FXCollections;
import javafx.collections.ObservableList;
import javafx.scene.Cursor;
import javafx.scene.Scene;
import javafx.scene.control.ChoiceBox;
import javafx.scene.control.ChoiceBoxBuilder;
import javafx.scene.layout.VBox;
import javafx.scene.text.Font;
import javafx.scene.text.Text;
import javafx.stage.Stage;
import javafx.stage.StageStyle;
//from w w w .  j ava2 s.  com
public class Main extends Application {
  ObservableList cursors = FXCollections.observableArrayList(
      Cursor.DEFAULT,
      Cursor.CROSSHAIR,
      Cursor.WAIT,
      Cursor.TEXT,
      Cursor.HAND,
      Cursor.MOVE,
      Cursor.N_RESIZE,
      Cursor.NE_RESIZE,
      Cursor.E_RESIZE,
      Cursor.SE_RESIZE,
      Cursor.S_RESIZE,
      Cursor.SW_RESIZE,
      Cursor.W_RESIZE,
      Cursor.NW_RESIZE,
      Cursor.NONE
    );
    @Override
    public void start(Stage stage) {
      ChoiceBox choiceBoxRef = ChoiceBoxBuilder.create()
          .items(cursors)
          .build();

        VBox box = new VBox();
        box.getChildren().add(choiceBoxRef);
        final Scene scene = new Scene(box,300, 250);
        scene.setFill(null);
        stage.setScene(scene);
        stage.show();
        scene.cursorProperty().bind(choiceBoxRef.getSelectionModel()
            .selectedItemProperty());

    }

    public static void main(String[] args) {
        launch(args);
    }
}
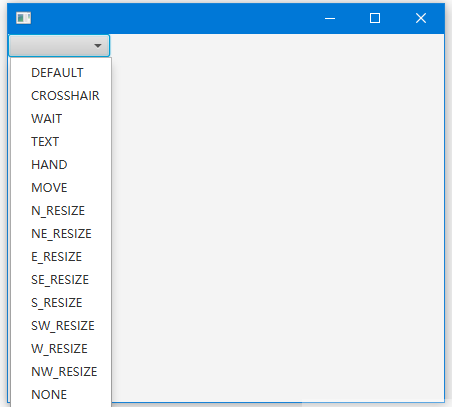
上面的代码生成以下结果。
本站文章除注明转载外,均为本站原创或编译
欢迎任何形式的转载,但请务必注明出处,尊重他人劳动共创优秀实例教程
转载请注明:文章转载自:代码驿站 [http:/www.codeinn.net]
本文标题:JavaFX选择框
本文地址:http://www.codeinn.net/javafx/1155.html
欢迎任何形式的转载,但请务必注明出处,尊重他人劳动共创优秀实例教程
转载请注明:文章转载自:代码驿站 [http:/www.codeinn.net]
本文标题:JavaFX选择框
本文地址:http://www.codeinn.net/javafx/1155.html